Posts RSS Comments RSS 48 Posts and 155 Comments till now

Archive for March, 2007

Making Symantec (Norton) AntiVirus update when logged out

Norton AntiVirus (now Symantec AntiVirus) is not, out of the box, able to automatically update it’s virus definitions or it’s application when running on a Macintosh. Symantec has posted two articles that, when put together, let you have all of your Macs update in the dead of night while they are logged out. I’ve been using this technique on all of the Macs in my computer labs for over a year with great success.

The two articles are Running LiveUpdate using UNIX commands and Scheduling LiveUpdate for all users using UNIX commands.

Putting the information from these two articles together you can set up your Macs to auto-update using this procedure.

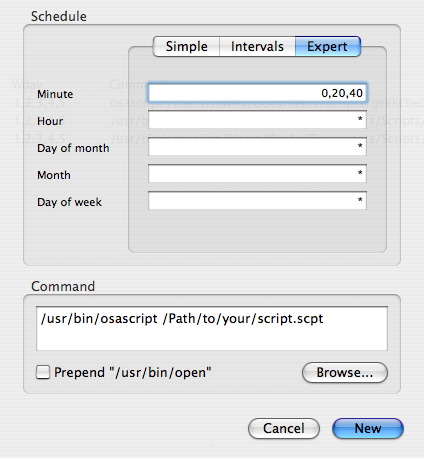
We’re going to set up a root-level cron job to run a command to update the things we need. I like to have it run around 3 AM. If you don’t know how to do it at the command line use Cronnix and edit the System cron job.

First we’ll cover the basic flag options you have.

-liveupdatequiet

If you don’t want that annoying LiveUpdate window to pop up (especially since you’re logged out) you need the -liveupdatequiet YES flag. If you do want it to show then leave this flag out.

The default action is to show it. However, if you are running this when the machine is logged out you could come in the next morning to a lot of machines with the LiveUpdate window showing behind the login window.

-liveupdateautoquit

If you want LiveUpdate to automatically quit when it’s done use the -liveupdateautoquit YES flag.

I’m not sure why you WOULDN’T want it to quit when it’s done.

Update options

To tell LiveUpdate what to update you have to choose from these options with the -update flag.

LUal = All Symantec products
LUdf = Norton AntiVirus virus definition updates
LUlu = LiveUpdate
LUna = Norton AntiVirus

Putting it all together

So, putting this all together, an example command to silently update the virus definitions would look like this. Watch out for line wraps. This should all be on one line:

/Applications/Symantec\ Solutions/LiveUpdate.app/Contents/MacOS/LiveUpdate -update LUdf
-liveupdatequiet YES -liveupdateautoquit YES

Things to watch out for

One “gotcha” to look out for. Symantec changed the name of the folder that holds LiveUpdate between versions 9 and 10. So, the above example will work in version 10. To have it work in version 9 use this path:

/Applications/Norton\ Solutions/LiveUpdate.app/Contents/MacOS/LiveUpdate

A second thing to watch out for is when you use the LUal option. If the actual AntiVirus or LiveUpdate applications get updated you’ll need to restart the machine. Norton will give your users an error message when they log in if the machine hasn’t been rebooted since the update.

For that reason I only update the virus definitions this way. When the actual applications need updating I run the command using the LUal flag using Apple Remote Desktop’s “Run UNIX command” function on all the machines at once and then restart them.

Using System Profiler in Terminal

There are times when you may need to get information about your system via the command line. Perhaps for a shell script or you’re already working in Terminal and it’s just quicker then opening the GUI version of System Profiler.

The command line version of System Profiler is, appropriately enough, “system_profiler”.

You can type man system_profiler to get a list of all the many things it can do. Here are a few examples.

You can get three different levels of reports.

  • system_profiler -detailLevel mini gives you a report without personal information
  • system_profiler -detailLevel basic gives you hardware and network information only
  • system_profiler -detailLevel full gives you everything

system_profiler -xml will export everything to an XML file for use in a web page or database. You can combine this command with others to get only certain information

For example, to get only the hardware and network information on a certain machine and write it to an XML file you can use this:

system_profiler -xml -detaiLevel basic > /Users/myaccount/Desktop/report.xml

Enter system_profiler -listDataTypes to get a list of the different areas that system_profiler gathers data on.

Those types are:

SPHardwareDataType
SPNetworkDataType
SPSoftwareDataType
SPParallelATADataType
SPAudioDataType
SPBluetoothDataType
SPDiagnosticsDataType
SPDiscBurningDataType
SPFibreChannelDataType
SPFireWireDataType
SPDisplaysDataType
SPMemoryDataType
SPPCCardDataType
SPPCIDataType
SPParallelSCSIDataType
SPPowerDataType
SPPrintersDataType
SPSerialATADataType
SPUSBDataType
SPAirPortDataType
SPFirewallDataType
SPNetworkLocationDataType
SPModemDataType
SPNetworkVolumeDataType
SPApplicationsDataType
SPExtensionsDataType
SPFontsDataType
SPFrameworksDataType
SPLogsDataType
SPPrefPaneDataType
SPStartupItemDataType

So, to get information on the type of hardware a machine has enter system_profiler SPHardwareDataType into Terminal and you’ll get something like this:

Hardware Overview:

Machine Name: Power Mac G5
Machine Model: PowerMac7,3
CPU Type: PowerPC G5 (3.0)
Number Of CPUs: 2
CPU Speed: 2.5 GHz
L2 Cache (per CPU): 512 KB
Memory: 2 GB
Bus Speed: 1.25 GHz
Boot ROM Version: 5.1.8f7
Serial Number: XXXXXXXXXXX

system_profiler SPPrintersDataType will give you all the information on the currently installed printers.

system_profiler SPFirewallDataType will tell you if the Firewall is on or off and if it’s on what rules are in effect. If the firewall is off you’ll get no return on the command.

Using the Screensaver to change my iChat status

Where I work I have lots of people stopping in to ask questions. Usually this involves me getting up to work with them, often for long periods of time. I’m not very good at remembering to change my iChat status to “away” so I came up with this AppleScript.

I have it run via a cron job every 20 minutes. It checks to see if the screen saver is active. If it is then it changes my iChat status to “away’. Simple.

Paste this code into Script Editor and compile. Save it out as a script file.

[codesyntax lang=”applescript” lines=”no”]
tell application “System Events”
set theList to the name of every process
if theList contains “ScreenSaverEngine” then
tell application “iChat”
set theStat to status
if theStat is available then
set status to away
set status message to “Away”
end if
end tell
end if
end tell
[/codesyntax]

Now use something like Cronnix to set it up as a cron job for your account.

When running AppleScripts either in Terminal or for something like a cron job you need to use “osascript”. If you’re using Cronnix you can use the settings below. Click “OK” in the window and then “Save” in the main Cronnix window and you’re done!

Cronnix cron tab settings window

Read the Login accounting file

This hint is for people who don’t have Apple Remote Desktop 3.0 and may need to know whose been logging into a machine. This can come in particular use if you run a public computing lab and need to know whose been logging into your computers at 2 AM or need to know if a certain student was using a computer at a certain time.

The login stats are kept in /var/log/ in a file named wtmp

Go to Terminal to run the commands below. You either have to be logged in as root or run them as sudo.

To find out how many times people have logged in during the current month:

ac -p

To find out when people have logged in during the current month:

last

To find out this information for previous months you must unzip the log files in /var/log

Example:

gunzip /var/log/wtmp.0.gz will unzip the previous months log files

After you have unzipped you can run the following:

To find out when people logged in during that month:

last -f "path to unzipped file"

Example:

last -f /var/log/wtmp.0

To find out how many times people logged in that month:

ac -p -w "path to file name"

Example:

ac -p -w /var/log/wtmp.0

Checking a users password using “dscl”

If you’re running an OS X server as an Open Directory master you can use this tip to check users passwords against a known password. For example, if you give all your users a default password and want to check if they’ve changed their password you can check with this technique. I know most people would say “Just check the box saying they have to change their password on login”. But, your users are Windows users that can cause a lot of headaches.

In Terminal enter the following:

/usr/bin/dscl /LDAPv3/127.0.0.1 auth matt knownpasswd

You either have to be logged into the server or have the server in your Directory Access authentication path for this to work. If you are logged into the server use “/LDAPv3/127.0.0.1” as the server path. If you are on a client machine and have it in your authentication path use the servers address. For example, “/LDAPv3/192.168.1.2”

This tests the password “knownpasswd” for the user matt in the LDAP directory. If the password is correct you’ll get no feedback. If the password is incorrect you’ll get a “-14090, eDSAuthFailed” error.

Look at man dscl for more information if needed.

Automator workflow to import images into PowerPoint

I have lots of users where I work that have folders full of pictures that they just want to import into PowerPoint. I came up with this Automator workflow to allow just that.

It makes a new PowerPoint presentation, then lets you select the folder that contains the images you want to import. It then pads the images so that they fit onto a standard PowerPoint slide and imports them.

This workflow uses actions from the Microsoft Automator Actions package.

Click on PowerPoint AutoImport Workflow to download

Get the system version using Terminal

There is a nice utility available from the command line that allows you get some basic system information quickly. All of this information is available in other places but there are times when it’s easier to get it at the command line.

Open up Terminal and type “sw_vers” (no quotes) and hit return. The results you’ll get look like this:


ProductName: Mac OS X
ProductVersion: 10.4.9
BuildVersion: 8P135

You can use different variations such as “sw_vers -productVersion” to get just that information. On the same machine in the first example that would return:


10.4.9

I recently had a need to get this information at the command line for an installer I was building. I only needed to know the first part of the product version (10.3, 10.4, etc.) so I put together a short shell script to grab that information for me.


#!/bin/bash

sysver=`sw_vers -productVersion | cut -c 1-4`
echo $sysver

if [ $sysver = 10.4 ]; then
echo "This is a Tiger System"
elif [ $sysver = 10.3 ]; then
echo "This is a Panther System"
else
echo "This system is too old"
fi

This script was just a “proof of concept” on for me. Once I knew it worked I could control what things happened depending on if the machine was running 10.4, 10.3 or an older version. Just substitute the “echo” statements for what should happen. If you want to try this out paste the script into a plain text document and save it with a “.sh” extension. Go into Terminal and make it executable with chmod.

Setting the startup disk using Terminal

While it’s quite easy to change which disk your machine starts up from using System Preferences there may be times when you need/want to do it either at the command line or within a script.

The command for setting the startup disk using Terminal is “bless“. To get the full story on “bless” open up Terminal and type “man bless” (no quotes).

To change the startup disk type the following in Terminal:

sudo bless -mount /Volumes/"name of your startup disk" -setBoot

So, if the desired disk was named “TestDisk” you would type this:

sudo bless -mount /Volumes/TestDisk -setBoot

If your disk name has spaces in it you’ll need to put quotes around the path to the disk, like this:

sudo bless -mount "/Volumes/My Disk" -setBoot

You can incorporate this into a UNIX shell script to reboot your machine to another disk at a certain time. Perhaps you want to reboot to another disk every Friday to run a disk utility on it, or to image it.


#!/bin/bash
bless -mount /Volumes/TestDisk -setBoot
shutdown -r now

Breaking down this script the first line sets the disk your Mac will boot from. The second line tells it to shutdown and restart immediately. If you have an Intel Mac you can add “–nextonly” at the end of the “bless” line. That will boot the machine to that volume first and then boot back to the original volume on subsequent reboots without having to reset the startup disk.

This command also comes in handy if you’re booting back and forth between volumes to test things. For example, you have a partition with 10.3 and another with 10.4 on it and you want to test some software in 10.3. You can wrap all of this up in an AppleScript and either save it on your desktop as an application or save it as a script and put it in your Script menu.

Paste this code in Script Editor and run it. Make sure you change the disk name to your disk. What for the AppleScript line breaks in the code. Any line that ends in “¬” means the line below is part of the same line. Pasting it in as it is on the web page will still work however.

[codesyntax lang=”applescript” lines=”no”]
do shell script “bless -mount \”/Volumes/Drive Name\” ¬
-setBoot with administrator privileges
do shell script “shutdown -r now” with administrator privileges
[/codesyntax]

Then simply click on the application or select if from the Script menu, enter your admin name and password and it will select the disk and reboot for you.

If you want to choose between several disks you can add in a dialog box to let you choose the correct disk.

[codesyntax lang=”applescript” lines=”no”]
display dialog “Select a startup disk” buttons ¬
{“name of disc 1”, “name of disc 2”]
set bootVol to the button returned of the result as text
do shell script “bless -mount \”/Volumes/” ¬
& bootVol & “\” -setBoot” with administrator privileges
do shell script “shutdown -r now” with administrator privileges
[/codesyntax]

Fixing Files with broken Resource Forks

This is less and less an issue but it still occasionally happens. Someone sends you a file, usually an application, that has resource forks in it. Either through the email system they used or the method the transferred to a server with the resource fork gets stripped out. Usually you’ll see it as a file with the same name as the application with a “.” in front of it.

You can recombine these into something useful with a somewhat hidden application on your Mac. It’s called, appropriately enough, “FixUpResourceForks”. It has to be run out of Terminal but it’s quite simple.

  • Open Terminal
  • Make sure both files reside in the same folder.
  • Enter the following in Terminal on one line:
    /System/Library/CoreServices/FixupResourceForks /path/to/folder

Obviously “/path/to/folder” is the path to the folder that holds both files. The easy way to find that is to type the first part of the command in Terminal followed by a space. Then drag the folder containing the files onto the Terminal window and it will automatically put in the correct path. Then just hit “Return” and it will recombine the files into one usable file again.

Identifying a DHCP server

Here are three quick ways to identify which DHCP server your machine is getting it’s IP address from. This can come in handy when trying to track down rogue DHCP servers that pop up on a network.

In Tiger:

  • Open System Profiler
  • Click on “Network”
  • Select which service you want to see
  • It is listed under “DHCP Server Responses:” next to “Server Identifier”

In Panther and below:

  • In Terminal type “ipconfig getoption en0 server_identifier”
  • Change “en0” to “en1″ if using wireless

You can also wrap it in an AppleScript. This should work on most version of OS X.

[codesyntax lang=”applescript” lines=”no”]
do shell script “ipconfig getoption en0 server_identifier”
set theIP to the result
display dialog “Your DHCP server IP is: ” & theIP
[/codesyntax]

Save it as an application. Great for getting this information from the Terminal-challenged user.

Next »