Posts RSS Comments RSS 48 Posts and 155 Comments till now

Check how much disk space is left using AppleScript

This is a fairly simple one but someone out there may need this. My boss recently had a weird problem where his disk was suddenly filling up. A reboot fixed it but we were having a hard time finding the process that was suddenly eating 15 GB of disk space with no warning. So, I came up with this script that just gets how much free space is left on his disk. We ran it as a cron job every 15 minutes so we could hopefully get some warning before things filled up and became unusable. The script displays a warning when the disk has 5% or less of free space. You can edit it for your own uses. It also has the ability to email the report to you. Comment out the section you don’t want to use. To have it send emails when you are not logged in use something like Lingon for a launchd item or Cronnix for a cron job. Save your script in the appropriate location and have the launchd/cron job call it using the “osascript” command. So, if the file was saved in the /Users/Shared folder the line would read:

osascript /Users/Shared/disk_check.scpt

[codesyntax lang=”applescript”]
set mysubject to “Disk Usage Report”
set myrecipient to “sysadmin@example.com”

–get the amount of free space
set dSize to (do shell script “df -h / | grep %”) as text

–pull out the percent used from the result
set theTotal to word 6 in dSize as number

–if the total used space is 95% or more put up a warning. Comment out if running the email section
if theTotal is greater than or equal to 95 then
display dialog “Your disk is ” & theTotal & “% full”
end if

–comment out this section if no email is desired.
set mybody to (“Free Space: ” & theTotal & “%”)
do shell script (“echo \”” & mybody & “\” | mail -s \”” & mysubject & “\” ” & myrecipient)
[/codesyntax]

Click here to download a copy: Disk Check script

Disable Directory Listing for User Sites Folder in Macintosh OS X

I’ve been using the “Sites” folder in my local home directory for some web development testing recently. I had a couple of directories created that didn’t include an “index.html” file. That means that anyone hitting the directory itself could list the contents and see all the other files I was working on in there. Not a major problem for what I was doing but a security issue none the less. After a quick bit of research I found it was quite easy to disable this at the command line.

Open Terminal and type cd /private/etc/apache2/users. Inside the “users” folder will be conf files for each of the users with accounts on the machine. So, if we have a user with the short name of “joe” on the machine there will be a file in there named “joe.conf”.

To edit this file you need to have root permissions. So open it using sudo. I prefer using pico as my editor but use whichever works for you. The command below assumes you are already in the “users” folder.

sudo pico joe.conf

You’ll see something like this:

Options Indexes MultiViews
AllowOverride None
Order allow,deny
Allow from all

Navigate down to the line Options Indexes MultiViews. Carefully delete the Indexes part of the line and save the file. Now restart Apache, either by going to System Preferences and turning off and then back on Web Sharing, or at the command line by typing sudo apachectl restart.

Now navigate to a directory in your “Sites” folder that doesn’t have an index file. You should get a “403 No permissions” error unless you specify a file. Much more secure. Note that you’ll need to do this individually for each account on the machine.

I’ve tested this with Snow Leopard and I’m betting it will work with Leopard. I’m not sure if versions of the OS below 10.5 support this feature.

Backing up MySQL databases on an OS X Server
I recently started using the build-in MySQL database server on my Leopard server. I’m collecting user login data in one database and SMB and AFP login information in another. Nothing major but information I wouldn’t really want to lose. I was looking for an easy way to backup these databases when a post on the MacEnterprise mailing list asked the same thing. Several people suggested AutoMySQLBackup, an open source shell script. After checking into it I can say it is an incredibly easy way of backing up all your data. The author has done a great service by posting this script.

The script backups up the databases to the local drive but can also email the backups to you. I wanted them emailed so I could archive them and have them backed up there as well. That way I don’t have to come up with any other scripts to move the backups some where else.

The AutoMySQLBackup script requires that you have Mutt installed if you want to have it email anything. Mutt is an command line email program that does not come pre-installed on OS X. Here are the steps I went through to get everything up and running.

Step 1 – Install Mutt

There are instructions on the Mutt website for installing the program but I wanted something I could easily update without a lot of hassle. I decided to install using MacPorts.

Download and install the latest version of MacPorts. There is excellent documentation on the web page. You’ll need the Apple Developer’s Tools installed before installing MacPorts. If you don’t already have them you can install them from your OS X install disc or download them from the Apple Developer Connection site.

Once MacPorts is installed an running you’re ready to install Mutt. At the time of this writing the default version of Mutt in the MacPorts repository is 1.4.2. I wanted the 1.5.x version as I had read that it was much easier to configure. Check the MacPorts list of available ports before you install. To get the 1.5.x version I had to install the development version.

In Terminal type the following:

sudo port install mutt-devel +smtp +ssl +imap +pop

If you want the standard install of mutt enter this:

sudo port install mutt +smtp +ssl +imap +pop

Then go do something else for a while as it downloads and compiles everything. After a bit you’ll have an install of mutt.

Step 2 – Configure Mutt

With the 1.5.x version of Mutt I only had to make one configuration file. In the home directory root of the account you are running the script from make a “.muttrc” file.

touch .muttrc

Now, use your favorite editor (I prefer pico) and add the address of the SMTP server you plan to use:

set smtp_url="smtp://my.smtp.server.com"

Now try sending an email from Mutt in Terminal and make sure everything is working correctly.

Step 3 – Configuring AutoMySQLBackup

Download AutoMySQLBackup and put it where ever you put your scripts. I changed the permission so that only the account I was running it from had any access.

chmod 700 automysqlbackup.sh

Open the script in your editor of choice. Don’t use Word or other such editors as they will mess up your line returns. Use a command-line editor or a GUI editor like SubEthaEdit that understands UNIX line returns.

The script author has great instructions right in the script so I won’t cover those here. I did, however, have to make two changes to the script to get things to work.

First, I had to add in the path to the MacPorts installation in the path variable for the script. That was on line 338.

The original reads:

PATH=/usr/local/bin:/usr/bin:/bin:/usr/local/mysql/bin

Edit it to look like this:

PATH=/opt/local/bin:/opt/local/sbin:/usr/local/bin:/usr/bin:/bin:/usr/local/mysql/bin

Remember, all the MacPorts installations live in /opt/local. Now the script can find Mutt.

The second change I had to make was to the order of items that the script was sending to Mutt. It just didn’t work in 1.5.x as written. This is on line 644 of the script.

The original reads:

mutt -s "$ERRORNOTE MySQL Backup Log and SQL Files for $HOST - $DATE" $BACKUPFILES $MAILADDR < $LOGFILE

I had to switch the order of $BACKUPFILES and $MAILADDR to get it send the file to me. So my edited version looks like this:

mutt -s "$ERRORNOTE MySQL Backup Log and SQL Files for $HOST - $DATE" $MAILADDR $BACKUPFILES < $LOGFILE

After making that switch and running the script it backed up my databases and emailed me the backup files as well. Fantastic!

Schedule your script to run on a nightly basis so you get regular backups of everything. You can either do that via cron or via a launchd item. If you want to use cron and don’t want to do it at the command line I recommend Cronnix. For launchd I recommend Lingon

One last note. When I was trying to troubleshoot why the attachments weren’t being send I couldn’t find the log files that said what was happening. That’s because the automysqlbackup script puts them in the script and then deletes them along with everything else after it mails them. To disable that function I had to comment out these two lines at the very end of the script:

eval rm -f "$LOGFILE"
eval rm -f "$LOGERR"

Once I had things working I uncommented them so things would continue to be cleaned up.

Getting user login data from Macs using AppleScript

A lab we work with recently upgraded to 10.5 and found that the program they were running to get the user login data for their billing wouldn’t work in 10.5 and wasn’t going to be upgrading. In looking at the data it was grabbing it was clear the same data could be gotten using the last command in Terminal. You can see more about last at my post here. However, these folks were not computer-savvy and needed the information in a comma-delimited file. So, I came up with this script.

When you run the script it asks you which month you want the data for in a list. Select the month and it will generate a file on the desktop with that months data. You can save it out as an application, run it from Script Editor or run it as a launchd/cron job. You can customize the output by changing the line that begins with “write”. For example, replace the “,” with tab and create a tab-delimited file instead.

If you run this script logged in as a regular user you will only get the login information for that user. If you run it as an administrator you’ll get the login information for every account on the machine.

Click here to download the script file:
Monthly Login accounting

[codesyntax lang=”applescript” lines=”no”]
set the_months to {}
set the_total to 0
set the_time to “”
set the_computer to (computer name of (system info))

--get the raw login log information
set the_login to (do shell script “last”) as text

set the_count to the count of paragraphs of the_login

--get the list of all the months login data is available for
repeat with x from 1 to the_count
if paragraph x of the_login contains “console” then
set month_check to (word 4 of paragraph x of the_login) as text
if the_months does not contain month_check then
set end of the_months to month_check
end if
end if
end repeat
set selected_month to choose from list the_months with prompt “Select the month:”

--create the file to write data to
if selected_month is not false then
tell application “Finder”
set file_name to (the_computer & “-” & selected_month & “-” & (year of (current date)) & ” login stats.txt”)
if not (exists file (((path to desktop from user domain as text) & file_name))) then
set login_file to make file with properties {name:file_name, file type:”TEXT”} at (path to desktop from user domain)
else
display dialog “This stats file already exists. Do you want to overwrite it?” buttons {“Yes”, “No”} default button 2
set the_answer to the button returned of the result
if the_answer is “Yes” then
delete file ((path to desktop from user domain as text) & file_name)
set login_file to make file with properties {name:file_name, file type:”TEXT”} at (path to desktop from user domain)
end if
end if
end tell
set login_file to ((path to desktop from user domain) & file_name) as text
end if

--loop through the data and pull out the logins for the selected month
repeat with x from 1 to the_count
if paragraph x of the_login contains selected_month then
if paragraph x of the_login contains “console” then
set the_user to (word 1 of paragraph x of the_login)
set the_month to (word 4 of paragraph x of the_login) as text
set the_logmonth to MonthNumber(the_month)
set the_day to (word 5 of paragraph x of the_login) as text
if (the (count of characters of the_day) is less than 2) then
set the_day to (“0” & the_day)
end if
set the_year to yearCheck(selected_month, the_months)
set log_date to (the_logmonth & “/” & the_day & “/” & the_year)
set login_time to (word 6 of paragraph x of the_login & “:” & word 7 of paragraph x of the_login)
set logout_time to (word 8 of paragraph x of the_login & “:” & word 9 of paragraph x of the_login)

set old_delims to AppleScript’s text item delimiters
set AppleScript’s text item delimiters to “(”
try
set the_time1 to text item 2 of paragraph x of the_login
set AppleScript’s text item delimiters to old_delims
set the_time to (characters 1 through 5 of the_time1) as text
on error
set AppleScript’s text item delimiters to old_delims
end try

–write all the date to the file
write (the_user & “,” & the_computer & “,” & log_date & “,” & login_time & “,” & log_date & “,” & logout_time & “,” & the_time & return) to file login_file starting at eof
end if
end if
end repeat

--if the list contains January see if the selected month comes before or after January. Adjust the year accordingly.
on yearCheck(selected_month, the_months)
if the_months contains “Jan” then
repeat with x from 1 to count of the_months
if item x of the_list contains selected_month then
set the_num to x
else
if item x of the_list contains “Jan” then
set jan_num to x
end if
end if
end repeat
set year_check to (the_num – jan_num)
if year_check is greater than 0 then
set the_year to ((year of (current date)) – 1)
else
set the_year to (year of (current date))
end if
else
set the_year to (year of (current date))
end if
return the_year
end yearCheck

on MonthNumber(the_month)
if the_month = “Jan” then
set the_month to “01”
else
if the_month = “Feb” then
set the_month to “02”
else
if the_month = “Mar” then
set the_month to “03”
else
if the_month = “Apr” then
set the_month to “04”
else
if the_month = “May” then
set the_month to “05”
else
if the_month = “Jun” then
set the_month to “06”
else
if the_month = “Jul” then
set the_month to “07”
else
if the_month = “Aug” then
set the_month to “08”
else
if the_month = “Sep” then
set the_month to “09”
else
if the_month = “Oct” then
set the_month to “10”
else
if the_month = “Nov” then
set the_month to “11”
else
if the_month = “Dec” then
set the_month to “12”
end if
end if
end if
end if
end if
end if
end if
end if
end if
end if
end if
end if
return the_month as string
end MonthNumber
[/codesyntax]

Switching between 32 bit and 64 bit mode in Snow Leopard

Out of the box Snow Leopard defaults to running in 32 bit mode. This is so the drivers for things like printers, scanners, network cards, etc. that have not been ported to 64 bit can run. Applications are unaffected by this. A 64 bit app will run in 32 bit mode and vice versa. If you’re not sure what mode your machine is running Snow Leopard in check out this article at MacObserver on how to tell.

The average user is much better off staying with the 32 bit mode for compatibility and ease of use. However, there may be times, especially for those running scientific software, when you need to run in 64 bit mode. And some servers, as mentioned in this Knowledge Base article do boot directly into 64 bit mode and may need to be set back.

You can choose to hold down the “6” and “4” keys on startup to boot into 64 bit mode. This will boot you into 64 bit for that boot cycle. When you reboot you will fall back to 32 bit again. Likewise, holding down the “3” and “2” keys on boot will put you into 32 bit mode.

If you want to change the mode and make it stick you need to do it at the command line. Fortunately Apple has added a command in the systemsetup tool for just that.

To check which mode you’re currently in run this command in Terminal:
systemsetup -getkernelbootarchitecturesetting

To set your machine to boot into 64 bit mode enter this command and reboot:
sudo systemsetup -setkernelbootarchitecture x86_64

To set your machine to boot into 32 bit mode enter this command and reboot:
sudo systemsetup -setkernelbootarchitecture i386

One oddity I’ve found so far is that on some machines that were upgraded from Leopard to Snow Leopard this command doesn’t appear in systemsetup. Do a man systemsetup before running it to make sure you have the Snow Leopard version of systemsetup

Enabling clear text passwords in Snow Leopard with AppleScript

Update: It appears that clear text passwords for AFP connections only work when booted into 32 bit mode. I’ve updated the script to check for which kernel the user is booted into. If they are running 64 bit it asks them if they want to switch to 32 bit. If they say “Yes” then it makes the switch and reboots the machine for them.

A nice article explaining how to see if you are running in 32 or 64 bit mode is here at MacObserver.

There is an Apple Knowledge base article dealing with servers but with good information on switching kernels here.

The procedure for enabling clear text passwords for AFP connections is the same in Snow Leopard as it is in Leopard with one very critical difference. The details about how and why are already in my post on Leopard. If you want the background information you should check out that page. This post will only deal with the Snow Leopard-specific changes.

The big change for enabling clear text passwords for Snow Leopard is that the .plist file is now a binary. This is something Apple has been moving towards since 10.4 and there is a built-in utility that allows you to change the format back and forth to allow for easy editing called “plutil”. The full path to it is “/usr/bin/plutil”

The flag we need to be aware of in “plutil” is the “-convert” flag. There are two formats that we’ll use for this flag, “xml1” and “binary1”.

To convert the plist file to XML to allow editing we have to run the following command:
/usr/bin/plutil -convert xml1 /Users/joe/Library/Preferences/com.Apple.AppleShareClient.plist

This will convert the file to XML for editing. Now we will do the actual editing. This line is the same as in Leopard.
defaults write com.Apple.AppleShareClient afp_cleartext_allow -bool YES

Now that we have edited the file we have to convert it back to binary form. So we use the “plutil” tool again with a different format:
/usr/bin/plutil -convert binary1 /Users/joe/Library/Preferences/com.Apple.AppleShareClient.plist

Now the preference file is converted back to binary and can be used by the AFP client.

Here is an updated version of the Leopard AppleScript for changing this setting.

If you would prefer to download a pre-complied script file click below:
Snow Leopard Clear Text Script

[codesyntax lang=”applescript” lines=”no”]
set afp_pref_path to ((POSIX path of (path to preferences from user domain)) & “com.Apple.AppleShareClient.plist”)
set OS_version to (do shell script “sw_vers -productVersion”)
set kernel_answer to “”

--check if the user is running 32 or 64 bit kernel.
if OS_version contains “10.6” then
set kernel_version to (do shell script “/usr/sbin/systemsetup -getkernelbootarchitecturesetting”)
if kernel_version contains “x86_64” then
set kernel_answer to button returned of (display dialog “You are currently running in 64 bit mode. Clear text passwords only work in 32 bit mode. Would you like to change to 32 bit mode? This will require a restart.” buttons {“Yes, change it and restart”, “No, just enable clear text”} default button 1)
end if
end if

try
set clearStatus to (do shell script “defaults read com.Apple.AppleShareClient afp_cleartext_allow”) as number
on error
--the first command will throw an error if the afp_cleartext_allow setting does not exist
--if there is an error we’ll assume that the setting isn’t there and set our variable to the disabled setting
set clearStatus to 0
end try
--a status of “1” means it’s enabled. So ask if they want to disable it
if clearStatus is 1 then
display dialog “Do you want to disable clear text passwords?” buttons {“Cancel”, “Disable”} default button 2
if the button returned of the result is “Disable” then
do shell script “/usr/bin/plutil -convert xml1 ” & afp_pref_path
do shell script “defaults write com.Apple.AppleShareClient afp_cleartext_allow -bool NO”
do shell script “/usr/bin/plutil -convert binary1 ” & afp_pref_path
set clearStatus to (do shell script “defaults read com.Apple.AppleShareClient afp_cleartext_allow”) as number
--check to make sure the change really took effect
if clearStatus is 0 then
display dialog “Clear text passwords have been disabled” buttons {“OK”}
else
display dialog “There was an error disabling clear text passwords!” buttons {“OK”}
end if
end if
else
display dialog “Do you want to enable clear text passwords?” buttons {“Cancel”, “Enable”} default button 2
if the button returned of the result is “Enable” then
do shell script “/usr/bin/plutil -convert xml1 ” & afp_pref_path
do shell script “defaults write com.Apple.AppleShareClient afp_cleartext_allow -bool YES”
do shell script “/usr/bin/plutil -convert binary1 ” & afp_pref_path
set clearStatus to (do shell script “defaults read com.Apple.AppleShareClient afp_cleartext_allow”) as number
--check to make sure the change really took effect
if clearStatus is 1 then
display dialog “Clear text passwords have been enabled” buttons {“OK”}
else
display dialog “There was an error enabling clear text passwords!” buttons {“OK”}
end if
end if
end if

if kernel_answer contains “Yes” then
do shell script “/usr/sbin/systemsetup -setkernelbootarchitecture i386” with administrator privileges
do shell script “/sbin/shutdown -r now” with administrator privileges
end if

[/codesyntax]

Disable Time Machine prompts for external disks

This certainly isn’t a new thing but I haven’t had a need for it until just recently. I moved my lab machines to Leopard and now every time you plug in an external hard drive it asks to use it for a Time Machine backup. That gets annoying fast. Use the defaults command in Terminal to shut it off. I used Apple Remote Desktop to send it out to all my machines at once.

defaults write com.apple.TimeMachine DoNotOfferNewDisksForBackup -bool YES

Using Time Machine with a networked drive

Those folks who are using Time Machine know how great it is for backing up everything quickly and easily. However, what if you can’t always have an external drive hooked up to your machine. Or, maybe you want to back up more then one machine to that drive. Time Machine backups live quite nicely next to other backups or files.

Out of the box Time Machine does not allow you to back up to a network drive. It just doesn’t show up when you go to choose a backup disk. You have to run a command in Terminal first to enable this function. On the machine you want to be able to access a network drive open Terminal and enter this command to enable networked drives in Time Machine:

defaults write com.apple.systempreferences TMShowUnsupportedNetworkVolumes 1

How to make your local external hard drive accesible to Time Machine

Now that you have your remote machine able to use Time Machine on a network drive how to you network the drive you want to use?

It’s important to know that Time Machine will only work on HFS+, also known as Mac OS Extended, drives. If your drive is formatted FAT or NTFS for use on Windows it won’t work. Also, Time Machine over the network only works for share points shared out using the version of AFP found in Leopard. You can’t share it off an older Tiger machine.

Create a share point for Time Machine

  • Open System Preferences and click on “Accounts”
  • Click on the lock at the bottom left of the window and enter your admin name and password.
  • Now click on the “+” at the bottom right of the window to create a new account. From the drop down at the top of the window select “Sharing only”. This will create an account that can only be used to access share points from the network. If you have that user already in your address book you can select them from that list. Otherwise just enter the desired name and password.

Now that you have an account for your network user to access the Time Machine share point you have to create it.

  • Create a folder on your local external drive to share out for backups
  • On a Leopard machine open System Preferences > Sharing. Then place a check next to File Sharing if it isn’t already checked.
  • Click on the “+” under “Shared Folders” and select the folder on your external drive.
  • The folder now shows up under “Shared Folders”. Select it and then click the “+” sign under “Users”. Add the “Sharing only” you created and make sure they have Read and Write permissions. You can delete the other users from that list so that only the remote user can access that share point if you prefer.

Configure Time Machine on the client

Now, go back to the remote machine and connect to that share point.

In the Finder select Go > Connect to Server and either put in the IP address of the machine you want to back up to or browse for it.

Once you’ve connected to the share go to System Preferences > Time Machine and click on the “Choose Backup Drive”. You should see your network share in the list. Select it and you’ll be asked for the login credentials again. Make sure you check the “Save in Keychain” option so you aren’t asked repeatedly.

Now configure Time Machine the way you want and you’re set!

Every time Time Machine runs it will mount that share point, back up to it and then unmount it. One of the security benefits from using Time Machine like this is that all of the files are saved in an encrypted disk image so they are more secure then a regular time machine backup.

Recommended AppleScript Books for Beginners

I’ve got several AppleScripts on this site and I get lots of questions about things relating to AppleScript. One of the questions I hear is “Are there any good books about AppleScript, especially for beginners”. Well, the answer is yes and no. I’ll give a few recommendations here that I think will help most beginning AppleScripters and possibly some more advanced ones. There are lots of sites out there as well such a Macscripter.net that also have a wealth of information. I encourage anyone looking into AppleScript to use these sites as well as printed materials.

Having said that I know that I personally benefit from having books around. In some cases it just an easy way to quickly look something up. Most books have examples on how to use either a scripting addition or a vanilla AppleScript command. Having those examples makes it a lot easier for me to figure things out.

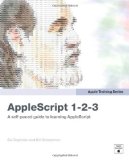
Apple Training Series: AppleScript 1-2-3


This book has replaced Danny Goodman’s fantastic but dated AppleScript Handbook (see below) as my recommended book for first time AppleScripters. The first author, Sal Soghoian, has been the AppleScript/Automater Product Manager at Apple for many years. I’ve been to lots of his talks and demos and he always has great examples of things you can do with AppleScript. His examples are fun and useful at the same time. The other author, Bill Cheesman, has been involved in AppleScripting from almost the very beginning and is extremely active in the AppleScript community.

This book assumes you have no knowledge of AppleScript or programming. It starts you out in the first chapter on the basics of writing scripts using AppleScript Editor with some cool one line scripts. From there he takes you through using dictionaries, working with the Finder and the file system.

After you get comfortable with working there you move on to actually learning some programming techniques such as looping and properties. However, Sal and Bill do it in such a conversational way you don’t even realized you’re learning actual programming.

This book contains a ton of useful scripts that can either be used right out of the page or, after doing the examples, can be easily configured for your own needs.

At the end of the book they cover a little bit concerning AppleScript Studio for those who want to move to the next level and create actual applications using only AppleScript as well as an introduction to Automator.

All in all this is an incredible book for beginning AppleScripters. The AppleScript community has been waiting a long time for Sal (and Bill) to write a book and it was obviously worth the wait.

 
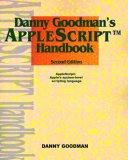
Danny Goodman’s Applescript Handbook

Until Sal’s book came out this was my go-to book. Danny Goodman has been around about as long as the Mac and his knowledge as well as his writing style are unsurpassed. He lays out the basics of AppleScript first and gives tons of examples each time. He steps you through each of the examples and explains what each line is about and why it does what it does. I learn languages best by doing lots of examples and see what things do. This book excels at that. The big issue with the scripts in the book is that they have become dated and you may find that some don’t work anymore as AppleScript is always evolving.

Many of the examples are short so you don’t get bogged down in code while trying to understand everything. It’s also a fantastic reference book. Whether you’re trying to find out what a list is or how to create a new folder all you have to do is look here. If you can find a used or on-sale copy I still highly recommend it as a reference book and intro to scripting.


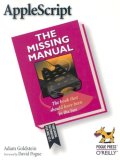
AppleScript: The Missing Manual


Applescript: The Missing Manual

Another in the “Missing Manual” series this is another great book for beginners. It’s full of great and useful scripting examples that you can use right out of the box. I started writing AppleScripts to do little things that I got tired of doing over and over. You’ll find lots of examples in this book of just that. And along the way you’ll find yourself thinking about how you can adjust those scripts to suit your needs. And THAT is the best way, in my opinion, to learn AppleScript.

The first three chapters of the book are all about getting your feet wet. It starts with showing you where things like Script Editor lives and the wide variety of scripts that already come with your Mac. You’ll open several of those existing scripts and edit them to change what they do. A great way to introduce scripting in my opinion. Change something, see what it does and go from there. The last chapter in that section shows you how to start creating scripts from scratch in Script Editor. You’ll cover things like creating dialog boxes and opening the AppleScript dictionaries of various applications to see what you can do with them.

The second section gets into more of the everyday aspects of AppleScript and what you can do with it. It covers topics such as manipulating text in Text Edit and Microsoft Word and how to move, select and delete files. People who work with graphics on a regular basis will like the sections on controlling Photoshop and iPhoto with AppleScript. I particularly liked the fact that he covers using the built-in Image Events to manipulate graphics. Image Events comes with your OS and lets you do very cool things with graphics without ever opening a program, such as determine color space, rotate the image or even convert it from one format to another.

This section also covers scripting iTunes and Quicktime but only briefly. With AppleScript you can access the features of Quicktime Pro without paying for the Pro license. It would have been nice to see more of that but the Quicktime section gets you started.

The Internet and Networking section has some useful scripts for Internet Connect and Airport but I think most people will find the Mail and iChat scripting section the most useful. The final chapter in this section covers database scripting, in particular making a small AppleScript database and scripting Filemaker Pro.

The third section of the book is labeled as the “Power Users” section but there are lots of things in there that the beginning scripter will find incredibly useful. Things like assigning scripts to folder actions so they run automatically will be immediately useful to many. And the section on running UNIX commands using AppleScript will open up a whole new world to many. There is a very brief chapter on using AppleScript Studio to create applications. It’s enough to get your started if you’re interested but otherwise you would be better off getting an actual AppleScript Studio book.

The most useful part of this section for any scripter has to be the Debugging section. Nothing is more frustrating when writing scripts, especially for new scripters, then getting error messages and having no idea what they mean. Script Editor does a great job of pointing out where the problem is but not in telling you how to fix it. This section covers in detail what many of those error messages mean and how to fix them. It also covers how to trap for errors that may occur and what to do in your script when they do.


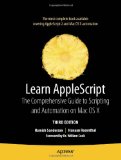
Learn AppleScript: The Comprehensive Guide to Scripting and Automation on Mac OS X, Third Edition (Learn Series)


This book is one of the more recent and takes things to the next level from the “Missing Manual” series. This book takes you into the meat of AppleScript and shows you how to do really great things like scripting all those command line tools you know are there but don’t want to open Terminal to use. You’ll even learn how to write scripts that can be executed on a remote Mac. This can be really handy when you need to re-start the Filemaker Pro database from across a campus or business. After you’ve gotten an understanding of the basics of AppleScript from the first two books this one will take you to the next level and get you writing more involved and exciting scripts.

These books are just a small sample of the things that are out there but I think these books will give anyone who is starting in AppleScript or wants a more complete understand the foundation they need. As I said, I like books that give lots of real world examples and all of these do exactly that and more.

Determining if an application is 64 bit, 32 bit or both

With the release of Leopard Macs now have the ability to run 64 bit applications natively from the GUI. Tiger, the previous release of the OS, supported 64 bit applications but only at the command line. Also, most Macintosh applications these days come as Universal Binaries so they can run on Intel and PowerPC machines.

So how do you tell if you have a 64 bit capable application?

The first place to look is the “Get Info” box of the application itself. If it has a checkbox that gives you the option to run it as a 32 bit application then it is 64 bit. But, is it 64 bit for Intel machines only or for both PowerPC and Intel?

The solution to the problem is found in Terminal using the file command.

Open up Terminal and cd into your application and find the actual compiled binary. This is located in /Contents/MacOS inside your application.

So, for example, if I wanted to check out iWeb I would type the following:

cd /Applications/iWeb.app/Contents/MacOS/

Typing ls once you are inside the app will show you the actual name of the binary.

Now, use the file command on that binary.

file iWeb

That returns the following:


iWeb: Mach-O universal binary with 2 architectures
iWeb (for architecture ppc): Mach-O executable ppc
iWeb (for architecture i386): Mach-O executable i386

Here’s how to read the results:

(for architecture ppc) = 32 bit PowerPC executable
(for architecture ppc64) = 64 bit PowerPC executable
(for architecture i386) = 32 bit Intel executable
(for architecture x86_64) = 64 bin Intel executable

So, we can see that iWeb has one 32 bit executable for PowerPC machines and one 32 bit executable for Intel (i386) machines.

« Previous PageNext Page »